How to manually load the HighPoint NVMe RAID Driver for macOS Big Sur
- Tutorial Videos & Installation Guides
-
FAQ
FnL Product Line Determining PCIe lane assignment for your SSD7000 Controller MacOS Windows Linux SSD6200 Series Controller SSD7000 Series Controller RocketStor Series RocketRAID Series RocketU Series Motherboard Compatible Report Other Questions Standard Responses for Known Issues or Subjects WebGUI eStore Gen5
- HPT
- Compatibility Reports
- FAQ
- Workaround Issue
How to manually load the HighPoint NVMe RAID Driver for macOS Big Sur
1. Test Description
In some cases, macOS 11.x may not load the NVMe driver after the initial restart. If you encounter this problem, we recommend following the procedure described below – it explains how to manually load the HighPoint NVme driver.
2. Procedure
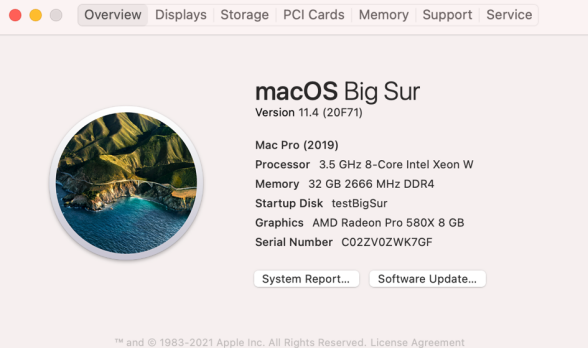
1) Click the Apple icon, and then click “System Report”:
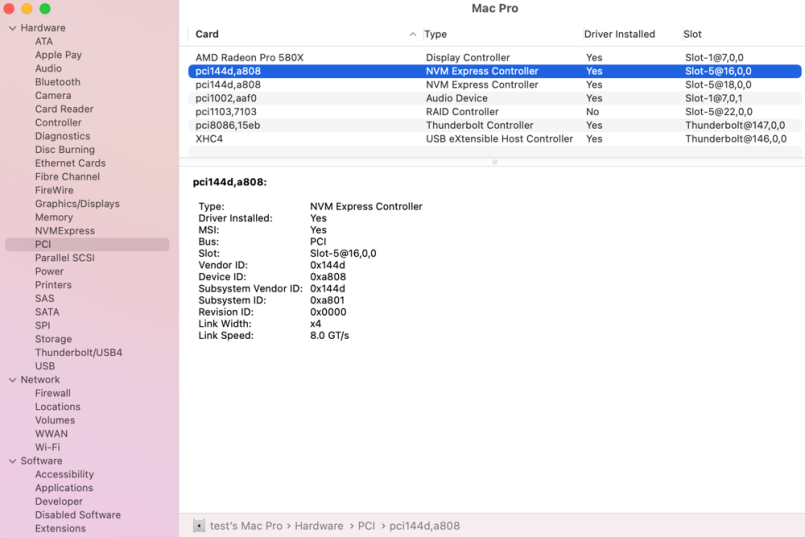
2) Click “PCI”, and verify that the NVMe RAID controller is properly recognized:
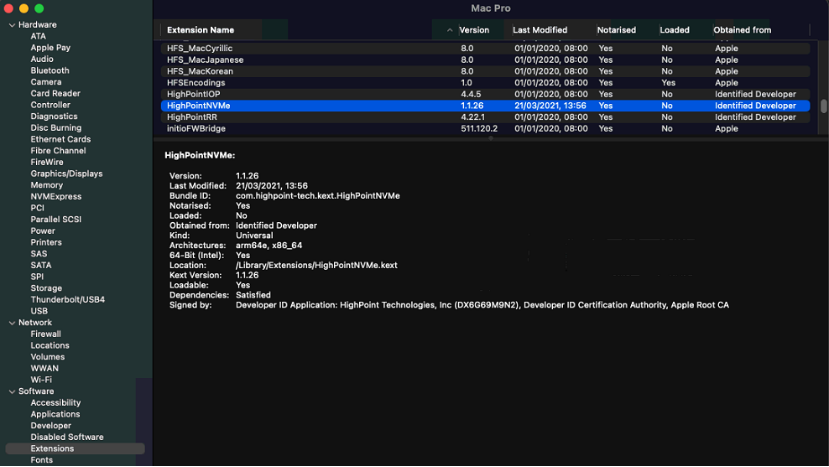
3) Next, click Extensions and look for the HighPointNVMe entry. If “No” is displayed under the Loaded column (as shown in the example below), you will need to manually load the driver.
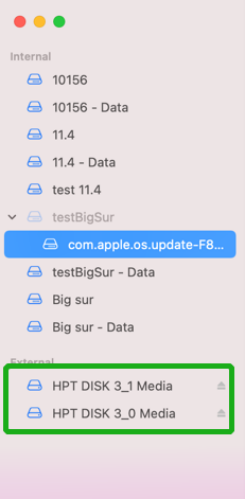
4) If the HighPoint NVMe driver is prevented from loading, macOS will recognize each NVMe SSD that was used to create the RAID array as a separate drive. The screenshot below shows how RAID 0 array will be recognized as two separate volumes if the driver is not loading:
5) Open terminal and Enter the following command to manually load the driver:
Sudo kextutil –tv 4 /Library/Extensions/HighPointNVMe.kext Depending on your security settings, macOS may require that you enter the login password to proceed.
3. Once the driver is manually loaded, macOS should recognize the RAID array as a single volume.