SSD7000/SSD7500 Series Controllers - How to load the UEFI ROM manually
- Tutorial Videos & Installation Guides
-
FAQ
FnL Product Line Determining PCIe lane assignment for your SSD7000 Controller MacOS Windows Linux SSD6200 Series Controller SSD7000 Series Controller RocketStor Series RocketRAID Series RocketU Series Motherboard Compatible Report Other Questions Standard Responses for Known Issues or Subjects WebGUI eStore Gen5
- HPT
- Compatibility Reports
- FAQ
- Workaround Issue
SSD7000/SSD7500 Series Controllers: How to load the UEFI ROM manually
Under what circumstances should you manually load the UEFI ROM?
If you encounter the following problem:
When operating in the UEFI environment; using the command “Arraycreate.efi “results in a “No Supported Controller Detected” error message.
Example Procedure:
1. You will need a bootable USB drive. A guide is available here:
HighPoint SSD7500 Series PCIe 4.0 NVMe RAID Controllers (highpoint-tech.com)

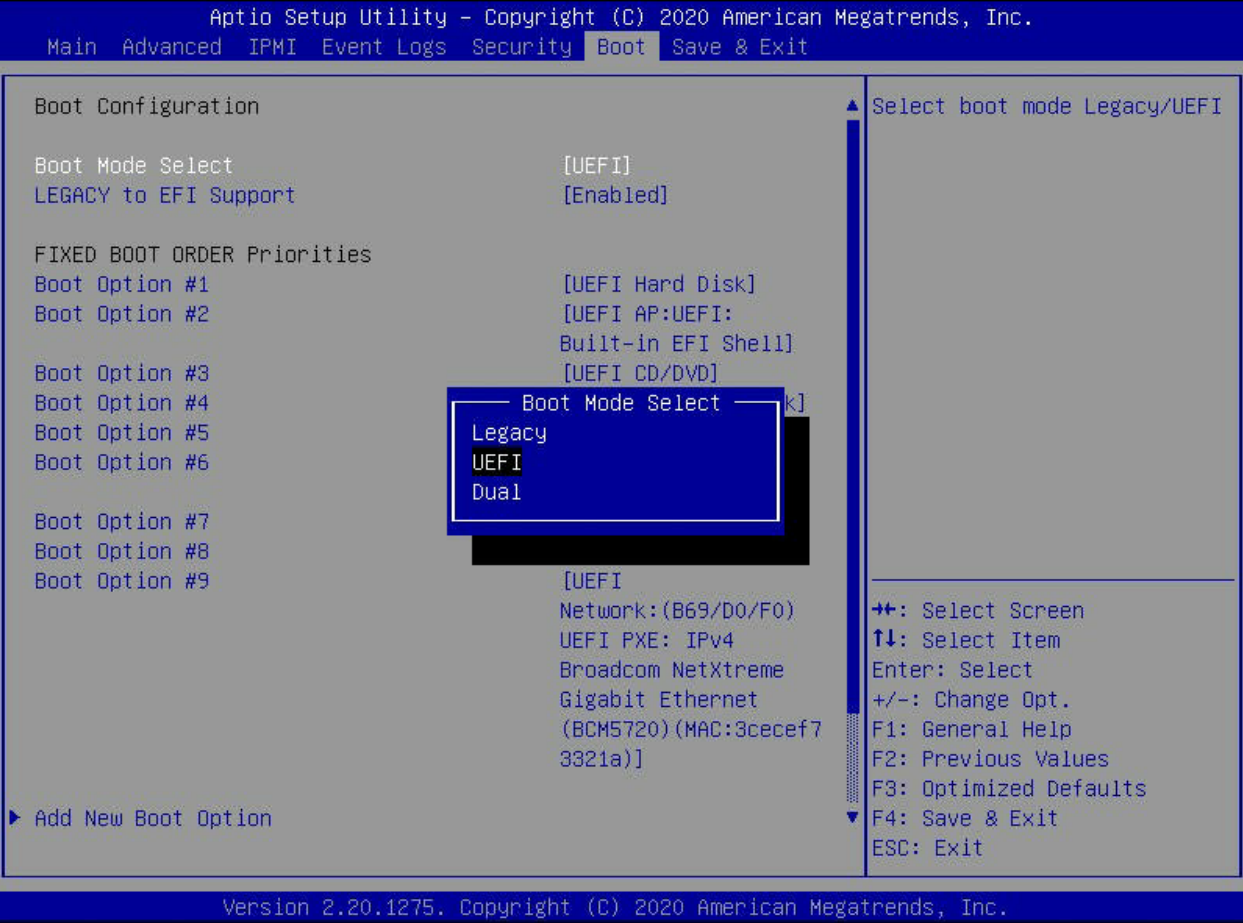
2. Set the system’s boot mode to UEFI:

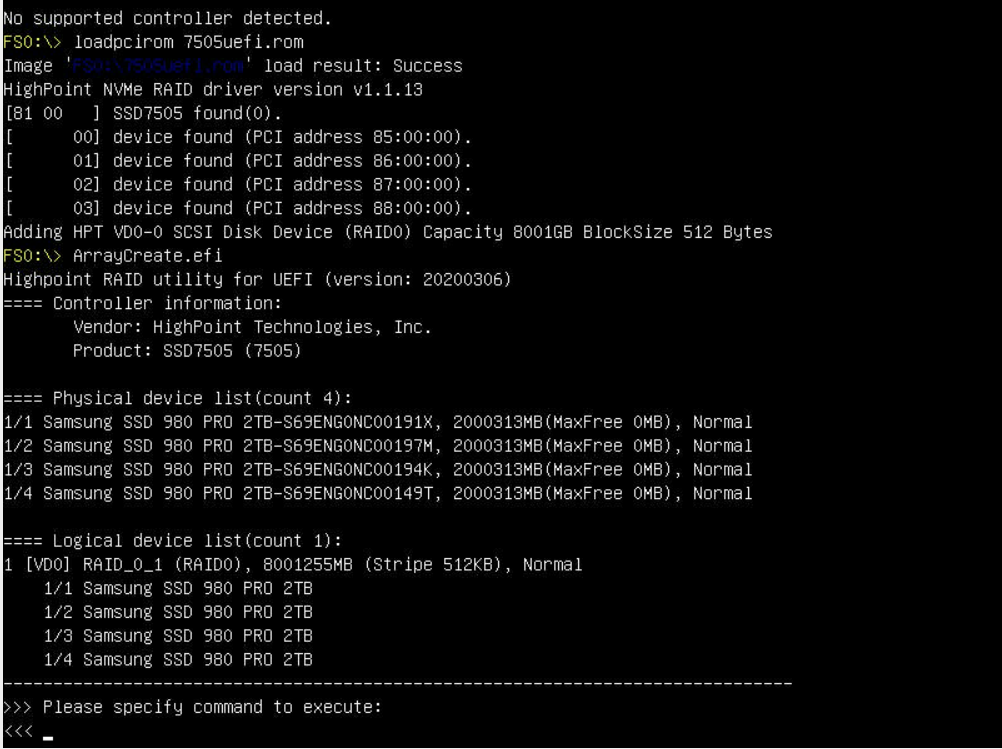
3. Boot from the USB device and enter the UEFI environment. Enter the command “ArrayCreate.efi” to start the RAID utility. The UEFI RAID Utility Reports “No Supported Controller Detected”: 
Note: If this error is reported, the HighPoint UEFI rom is not compatible with the current UEFI environment.
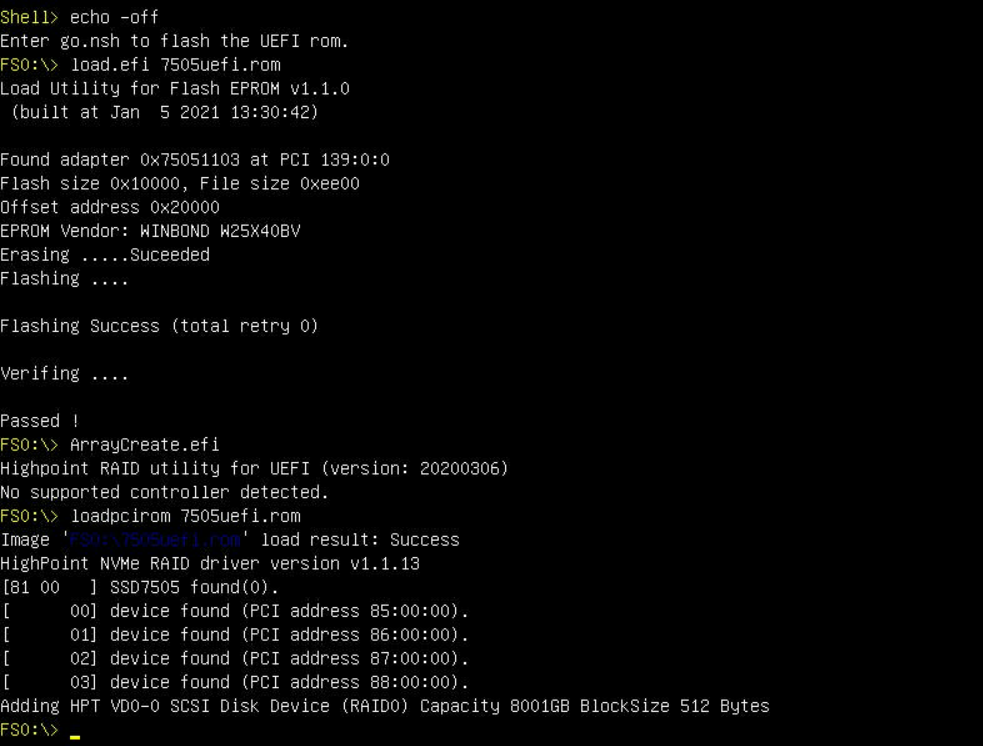
4. If you experiece the above error, enter the following command:
loadpcirom xxx.rom
xxx refers to the name of the ROM file you are working with (the screenshot below was taken while using the SSD7505).

Based on the output of this command, we can determine whether our UEFI driver is incompatible with your motherboard.
If this command is able to start the UEFI RAID utility, this suggests that the motherboard’s BIOS settings do not allow third-party ROM files to be loaded.
Video Reference
In addition to the procedure described in this article, you can refer to the following video: