SSD7000 Series Performance Test Guide (mac)
- Tutorial Videos & Installation Guides
-
FAQ
FnL Product Line Determining PCIe lane assignment for your SSD7000 Controller MacOS Windows Linux SSD6200 Series Controller SSD7000 Series Controller RocketStor Series RocketRAID Series RocketU Series Motherboard Compatible Report Other Questions Standard Responses for Known Issues or Subjects WebGUI eStore Gen5
- HPT
- Compatibility Reports
- FAQ
- Workaround Issue
macOS
Step 1 Download Performance Testing tool
We recommend using the ATTO Disk Benchmark utility to test the NVMe RAID array’s performance in a Mac Pro 2019 environment.
1. Download ATTO Disk Benchmark (a macOS 10.15 system was used for the following example):
ATTO Disk Benchmark:
https://www.atto.com/software/files/drivers/atto-disk-benchmark-macos-1.00.0f1.dmg
Or: Download from the App Store

Step 2 Expansion Slot Utility
The SSD7000 Series RAID Controller is best installed into either slot 3 or 5 – both slots can be set to operate at a full 16-lanes, and can be used at the same time – ideal for a Cross-Sync RAID configuration.
1. To configure the PCIe slot, access the macOS Expansion Slot Utility (found under the Apple menu > About This Mac > PCI Cards):

- First, make sure Automatic Bandwidth Configuration is unchecked. This will ensure that your selection is locked in (macOS won’t alter the lane assignment based on system activity);
- For the target PCIe slot, click the circle under the A column for x16.

Note: If you wish to configure a Cross-Sync configuration, both slots 3 and 5 must be configured in this fashion.
Step 3 Check the PCIe Lane assignment
1. Start the WebGUI management software and click the Physical Enclosure 1 tab;
- SSD7100 Series RAID Controllers require a dedicated PCIe 3.0 x16 slot in order to perform optimally;

2. If you are configuring a Cross-Sync RAID array, repeat this procedure for Enclosure 2 to check the PCIe Lane assignment.

Step 4 Configure the RAID Array (e.g. RAID0)
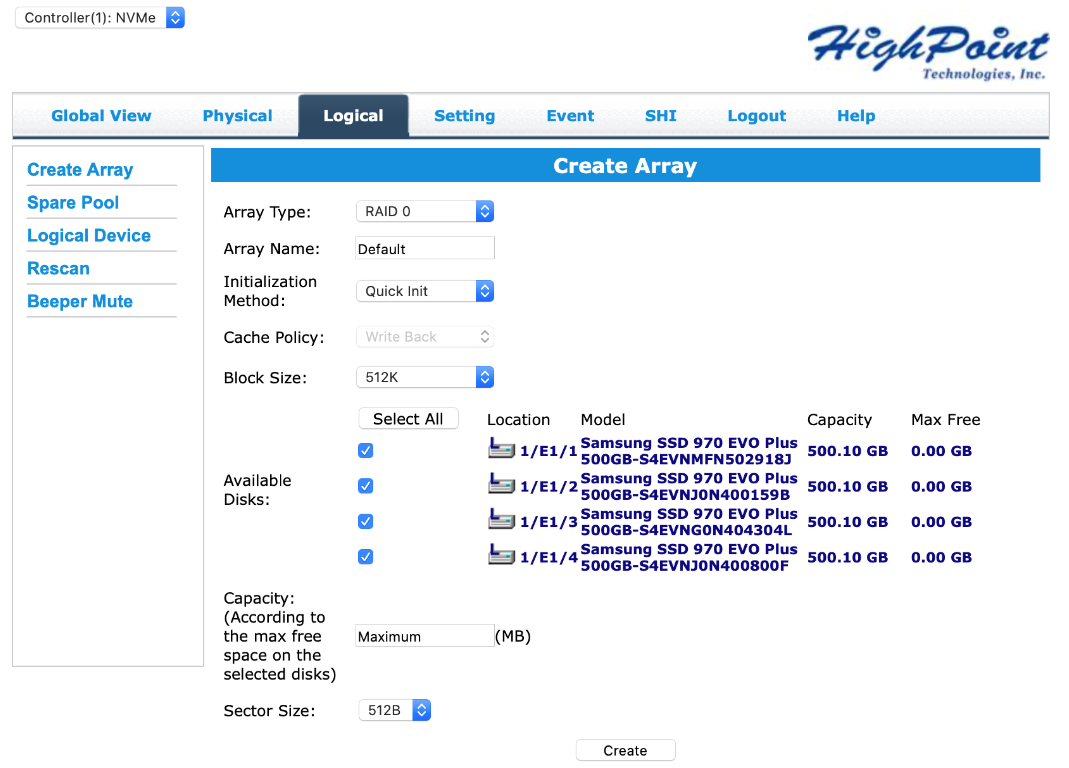
1. Create a RAID array using the WebGUI.
WeGUI:
- To configure the NVMe RAID array, access the WebGUI management software, and click the Logical tab;
- Click on Create Array and configure the NVMe SSD’s as a RAID 0.

2. Access Disk Utility and format the RAID array. Name, partition and format the array as desired. Once complete, it will mount on the desktop and be available for use.

Step 5 Start the Performance Test (e.g. RAID0)
1. Use the following parameters:
|
|
General Parameters File Size: 16GiB Que Depth/Disk: 256 Write Pattern: 0x0000000 (default) Streams/Disk: 1
I/O Size Range Start: 2 MiB End: 64 MiB |
Note: Snapshot will run a single test. Continuous will repeat the test procedure until manually stopped.
2. After setting the parameters, click the Add Disk button and browse to the array volume:

3. Click the Start button to being the performance test.

