RAID Expansion (OCE & ORLM)
- Tutorial Videos & Installation Guides
-
FAQ
FnL Product Line Determining PCIe lane assignment for your SSD7000 Controller MacOS Windows Linux SSD6200 Series Controller SSD7000 Series Controller RocketStor Series RocketRAID Series RocketU Series Motherboard Compatible Report Other Questions Standard Responses for Known Issues or Subjects WebGUI eStore Gen5
- HPT
- Compatibility Reports
- FAQ
- Workaround Issue
RAID Expansion (OCE/ORLM)
Important: Before using OCE/ORLM, we recommend that you Verify the current RAID array, using the WebGUI’s Verify function, under Maintenance. The OCE/ORLM process is irreversible; once you start an OCE/ORLM procedure, the process can be temporarily paused (using the Maintenance option), but it must ultimately be resumed until completion.
OCE – Online Capacity Expansion
OCE allows you to add storage capacity to an existing RAID array while preserving your existing data. In most cases, this feature is used when adding one or more physical drives to an array (for example, expanding from a 3-drive RAID 5 configuration to a 7-drive RAID 5 configuration).
To Expand an Array:
1. Start the WebGUI and click the Logical tab
2. Locate the array you want to expand, and click the Maintenance option displayed to the far-right of the interface:

3. Under the “JBOD/Volume” drop-down menu, make sure you select the array’s current RAID level. In this example, the target array is a RAID 5 configuration: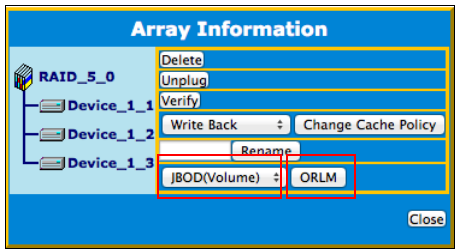
4. Click the “ORLM” button continue. The WebGUI will display the following warning message. Click OK if you wish to proceed.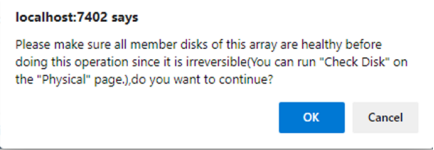
5. This will open the “Array transform/transforming” menu: 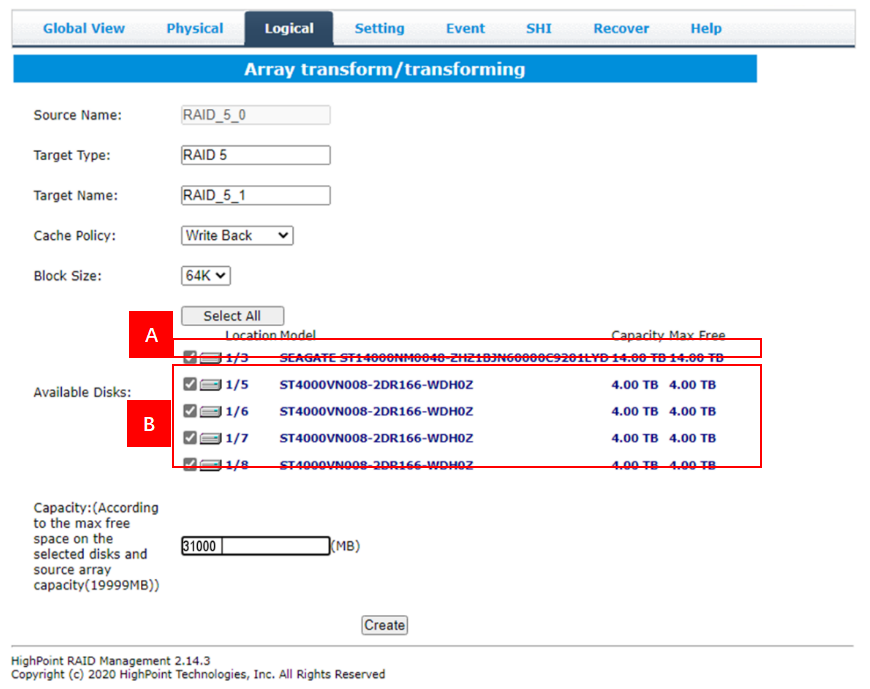
6. First, check the box before the top entry (A) – this is the current array.
7. Next, check the box for each additional drive you want to add to the array (B)
8. Click “Create”. The WebGUI will announce that your new configuration was created successfully. Click OK to continue.
9. The Status will change to “Migrating” and will display a progress bar: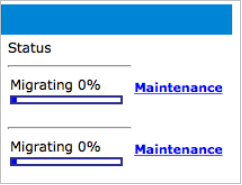
10. Once complete, your operating system will recognize the additional capacity as unpartitioned space – you are free to partition/format this space as a separate volume, or expand the current partition to include this space.
ORLM – Online RAID Level Migration
ORLM allows you to change one RAID level to another RAID level while preserving your existing data; for example, converting a RAID 5 array to a RAID 6 array.
To Migrate a RAID Array to another RAID Level:
1. Start the WebGUI and click the Logical tab
2. Locate the array you want to expand, and click the Maintenance option displayed to the far-right of the interface:
3. Under the “JBOD/Volume” drop-down menu, make sure you specify the new RAID level you want to create. In this example, the target array is a RAID 5 configuration. They will add 4 additional drives and change the array to RAID 6: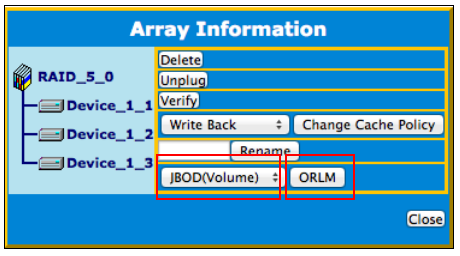
4. Click the “ORLM” button continue. The WebGUI will display the following warning message. Click OK if you wish to proceed.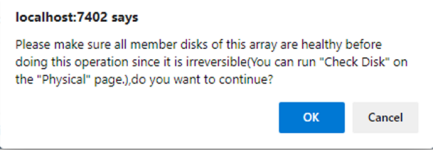
5. This will open the “Array transform/transforming” menu: 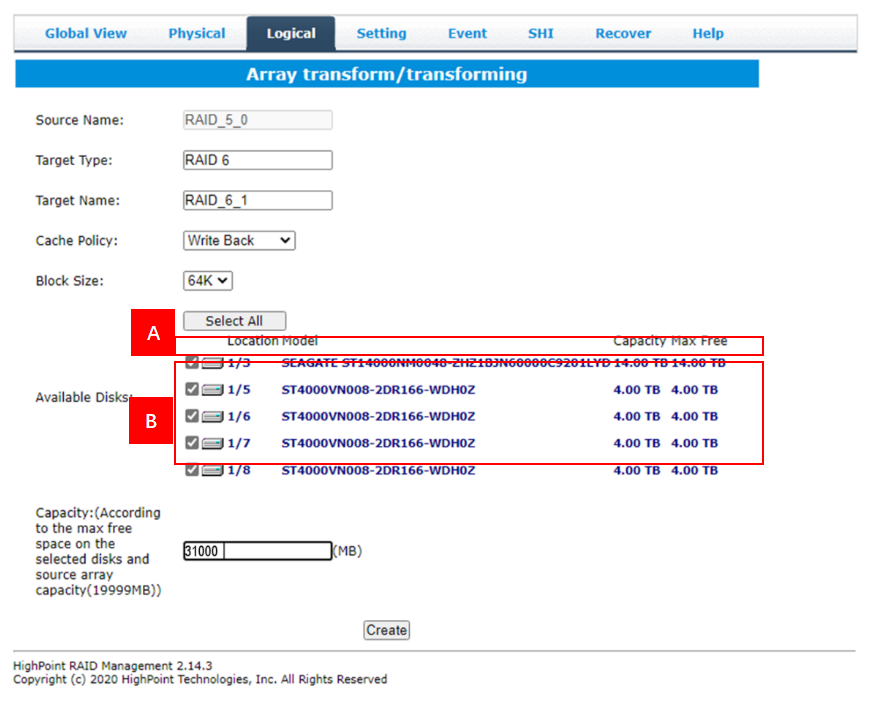
6. First, check the box before the top entry (A) – this is the current array.
7. Next, check the box for each additional drive you want to add to the array (B)
8. Click “Create”. The WebGUI will announce that your new configuration was created successfully. Click OK to continue.
9. The Status will change to “Migrating” and will display a progress bar: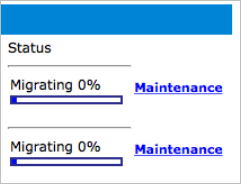
10. Once complete, your operating system will recognize the additional capacity as un-partitioned space; you are free to partition/format this space as a separate volume, or expand the current partition to include this space.